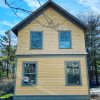
We’ve recently completed a major renovation of a contemporary home built by my father in the mid 1970’s. Piece by piece and room by room, we’ve totally re-invigorated every aspect of the house. Some rooms or items deserve a little more attention including this kitchen. So take a good look at the photo above!
At some point in time, this kitchen was remodeled before us. You can notice new granite, new sink faucet, and new appliances. However, we took it further and changed the entire theme.
To start, we threw out the existing island and proceeded to remove all the granite countertops to make way for new Michaelangelo Marble. All of the kitchen cabinet doors and drawer faces were removed for painting while we also awaited new hardware.
You’ll also notice from project photos, that we extended the tops of the cabinets to the ceiling and finished with a crown molding. On the right side of the kitchen, we removed a granite desk area and built a new cabinet plus an area for a built-in microwave.
New countertops were installed along with a new cottage board backsplash. We even brought the cottage board around the sides of the existing refrigerator. Over the range, we removed the granite and installed a custom design mexican hand painted tile backsplash. We then took the existing hood you see in the photo above and built a custom cottage board enclosure around it, tying it nicely together with the existing cabinets.
On the closest wall, not pictured above, we built a row of base cabinets that include a wine refrigerator and upper glass cabinets with glass shelves. The upper cabinets have lighting inside and below and were finished with a new marble countertop.
To top it all off, we needed to create a new island for the kitchen. The concept was to combine a cabinet base with the look of a kitchen table. We one large cottage board cabinet, where you can open doors on both ends and reach all the way through… perfect for extra large items. The table end of the island received two tapered legs with a single bead on the corners to tie the look together. After all said and done, we then were able to find reclaimed chestnut, which the island top was made of. Two new lights were then hung over top to provide a more balanced light than the original single.
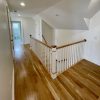
A few fresh coats of paint, sanding and finishing the floors in a new color, and some finishing molding details helped make this remodel a full overhaul. Enjoy the photos and be sure to check out the full album here.